Leave Your Message

Why Do Mechanical Seals Fail So Often?

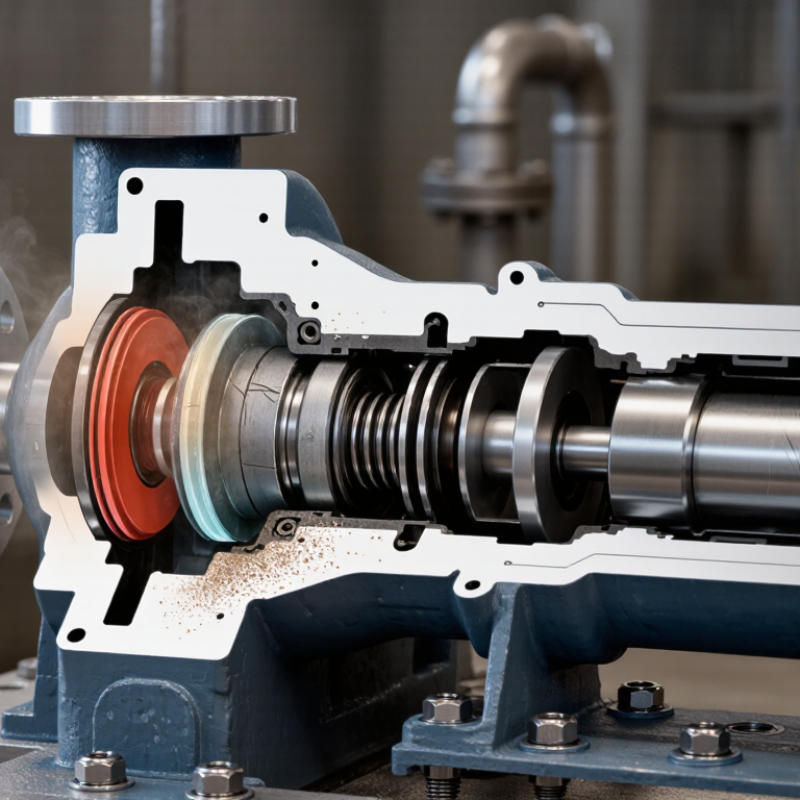
Mechanical seals rarely fail without warning. A pump may begin with a faint hiss, a warm bearing housing, or a thin wet ring beneath the gland. Those small clues are easy to dismiss. They matter.

Reliability author Heinz P. Bloch has written extensively about machinery failures and the conditions that cause them. A responsible summary of his reliability-focused approach is this: “A component’s life depends on the system in which it operates.” This is a paraphrase, not a verified verbatim quotation. That distinction matters when discussing technical advice. In practice, seal performance depends on more than seal material or price. Poor alignment, dry running, vibration, heat, contamination, and sudden pressure changes can all contribute to failure. A seal selected for clean water may struggle when a process carries abrasive particles or fluctuates in temperature. The details are specific.

This article examines why Mechanical Seals fail so often, from installation errors to operating conditions that quietly accelerate wear. It also considers what inspection can reveal: uneven face wear, hardened elastomers, scoring, or leakage paths around the seal. Not every failure has one clear cause. Sometimes the evidence is incomplete, and maintenance records are missing. That is frustrating. It is also a reason to avoid quick assumptions. Careful troubleshooting starts with the operating history, the failed parts, and the conditions around the equipment—not simply replacing the seal and hoping for better results.
Why Do Mechanical Seals Fail So Often?

How Mechanical Seals Work and What They Must Withstand

Mechanical seals limit leakage where a rotating shaft enters a pump or mixer. A rotating face runs against a stationary face, usually with a thin fluid film between them. The faces are precisely finished, but they are not meant to run completely dry. Springs or other loading mechanisms keep them in contact as pressure and movement change.

That film carries away heat and reduces wear. The seal must also withstand process pressure, temperature changes, vibration, and contact with the pumped fluid. Abrasive particles can scratch the faces; chemical incompatibility can damage elastomers. Dry starts are especially harsh. A seal may look sound from outside while its faces are already worn. I’ve seen how easy it is to blame the seal before checking the operating conditions.

Tips: Check alignment and flush flow before startup. Confirm that seal materials suit the fluid and temperature. Watch for leakage, noise, or rising temperatures. Small changes matter.

Failure is not always caused by poor workmanship. A pump operating far from its intended flow range may vibrate or overheat, shortening seal life. Maintenance records can reveal whether failures follow a dry start, a process change, or recurring solids in the fluid. Still, records are only useful when readings are consistent; that part is often neglected. Follow the equipment maker’s service guidance, and have a qualified technician inspect persistent leakage or abnormal heat.
The Main Types of Mechanical Seal Failure

Why Do Mechanical Seals Fail So Often?

The Main Types of Mechanical Seal Failure

Mechanical seal failure often shows up as leakage, but the visible drip may be the last symptom. A seal can fail because its faces run dry, overheat, or lose proper contact. Dry running may leave heat discoloration or fine cracks on the faces. Abrasive particles can score them, creating narrow paths for fluid to escape. Small marks matter.

Chemical attack is another common cause. An incompatible fluid can swell or harden elastomers, while corrosion can damage metal parts. Vibration, shaft movement, and poor alignment may also disturb the seal faces. These causes can overlap, so replacing a damaged component without checking operating conditions may lead to another failure. Diagnosis is not always neat; inspection findings need to be compared with the pump’s actual service history.

Tips: Before disassembly, record when leakage occurs, the fluid temperature, and any changes in vibration. After shutdown, follow the equipment’s isolation procedures. Examine the faces and elastomers for cracks, grooves, swelling, or heat damage. Check alignment and operating conditions too, since a new seal cannot correct a persistent dry-running or vibration problem.

Operating Conditions That Accelerate Seal Wear

Why Do Mechanical Seals Fail So Often?

Operating Conditions That Accelerate Seal Wear

A mechanical seal depends on a thin fluid film between its faces. When that film breaks down, friction and heat rise quickly. Even a brief dry start can score the faces, leaving fine circular marks. The pump may still run, but leakage can appear days later.

Abrasive particles cause another common problem. Sand, rust, or crystallized product can scratch the sealing surfaces, especially when the flush is weak or blocked. A clear-looking liquid is not always clean enough. Small particles can do real damage. Heat cycling also matters: repeated starts and stops make components expand and contract, while unsuitable elastomers may harden or swell.

Operating conditions can be less obvious than a damaged face. Misalignment, worn bearings, and pipe strain create vibration that keeps seal surfaces from tracking evenly. Pressure spikes may distort parts or push fluid past the seal. During troubleshooting, technicians should compare leakage timing with temperature, pressure, and startup records. A seal that leaks only after a hot restart tells a different story from one that drips steadily. These clues are useful, but not perfect; installation errors can produce similar symptoms.

Installation and Maintenance Errors That Cause Failure

Mechanical seals often fail before they run. A nicked O-ring, dirty mating faces, or a seal fitted dry can create a leak path within hours. The Fluid Sealing Association and European Sealing Association’s Mechanical Seal Handbook identifies installation, operating conditions, and maintenance as key factors in seal reliability. In practice, small details matter: keep grit off the faces, follow the specified setting dimension, and check shaft runout before assembly. A clean-looking seal can still be damaged.

Maintenance errors can be just as costly. Dry running, blocked flush lines, and neglected vibration checks may overheat faces or wear them unevenly. The U.S. Department of Energy’s Operations & Maintenance Best Practices Guide reports that predictive maintenance can reduce equipment breakdowns by 70–75% and downtime by 35–45%; these figures cover industrial equipment broadly, not seals alone. Still, they support routine condition checks. One uncomfortable point: teams may blame the seal before checking the pump. I would inspect the flush path and alignment first, though that order is not always followed when production is under pressure. Keep a simple record of leaks, vibration, temperature, and installation measurements. Small notes help reveal repeat mistakes.

Why Mechanical Seals Fail: Installation and Maintenance Risks

Common installation and operating problems can damage seal faces, disrupt lubrication, or prevent proper heat removal.

Relative risk ratings are illustrative engineering rankings, not measured failure-rate percentages. Actual risk depends on seal design, equipment, fluid, and operating conditions.

How to Diagnose and Prevent Mechanical Seal Failures

Mechanical seals rarely fail for one reason alone. A steady drip may point to damaged faces, but it can also follow dry running, pressure changes, or poor flushing. Start with the operating history: note when leakage began, pump speed, liquid temperature, pressure, and any recent startup or maintenance. Small details matter. A seal that leaks only after warm-up tells a different story from one that leaks immediately.

Inspect the removed parts before cleaning them. Look for heat discoloration, uneven wear, chips, deposits, and elastomer swelling. Check shaft runout, sleeve condition, bearing play, and alignment; vibration or pipe strain can keep seal faces from tracking evenly. Compare findings with the seal’s specified operating range and the fluid’s chemistry. Don’t diagnose from the leak alone. It is easy to blame installation, and sometimes that is wrong. Not always.

Prevent repeat failures by keeping the seal chamber clean and supplying the specified flush or barrier fluid at the required flow and pressure. Prime the pump fully, avoid dry starts, and verify alignment after piping is connected. Record leakage, vibration, temperature, and maintenance changes over time. Trends often reveal a developing problem earlier than a single inspection. No checklist catches everything; field conditions can surprise even experienced technicians. That uncertainty is a reason to preserve evidence, not replace parts blindly.